Getting started
Using subshare is easy. You simply have to follow a few steps:
Install Java
If you didn't install Java, yet, you should do this now. Please download and install either Oracle Java or the OpenJDK. Subshare requires Java 8 and its GUI client needs JavaFX (included in Oracle's JRE).
If you use Ubuntu, you could open a shell and enter the following command to install the OpenJDK 8 together with OpenJFX:
sudo apt-get install openjdk-8-jre openjfx
Install server or use demo-server
For your first tests, you can skip the installation of a server. We provide one for demo/test purposes: https://demo.subshare.org:6661
In the following description, we're using this server. But for productive use, you must install your own server.
Important: We periodically delete all data from our demo-server!
Download client (GUI)
Download the subshare GUI-client to your local machine. It is recommended that you download the PGP signature, too, and verify the authenticity of the binary file.
In the following, we assume that you downloaded the file org.subshare.gui-0.10.3-bin.tar.gz into your ~/Downloads/ directory.
Extract GUI client on your workstation
Locally, on your workstation, you have to extract the client and move it to your home directory:
…via shell:
cd ~/Downloads
tar xzf org.subshare.gui-0.10.3-bin.tar.gz
mv subshare ~/
…via file manager:
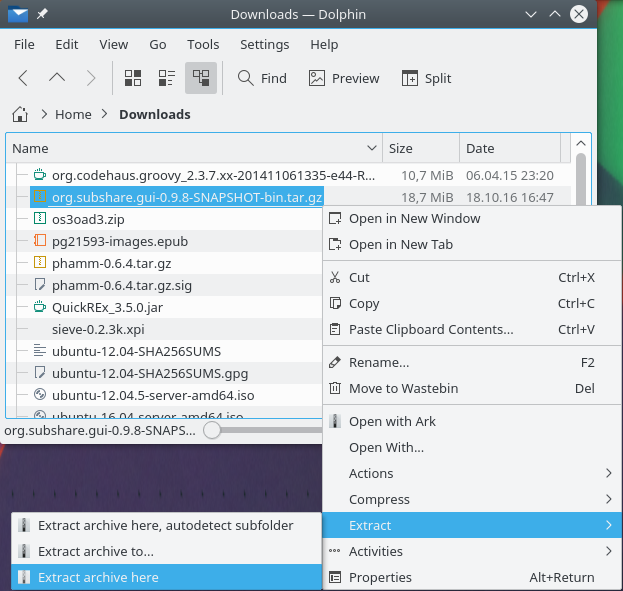
This “Extract” > “Extract archive here” action creates the new folder subshare in the current directory. Move it to your home directory (from ~/Downloads/subshare/ to ~/subshare/).
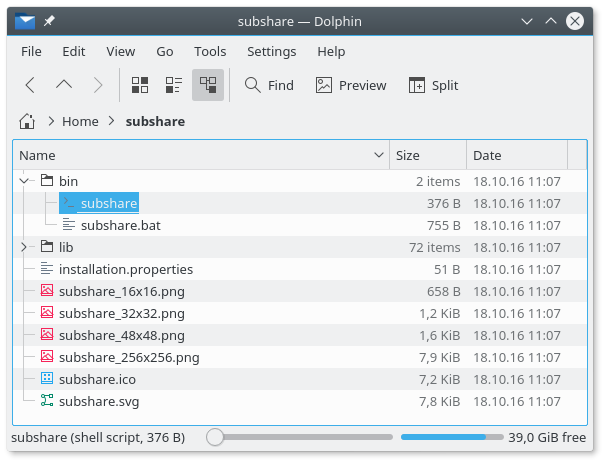
Start subshare
Double-click onto the executable ~/subshare/bin/subshare (*nix) or ~/subshare/bin/subshare.bat (Windows):
Create identity
In order to share data with others, everyone involved needs an identity. This can be your real name & e-mail address or a pseudonym. You can also omit the e-mail address.
Technically, your identity is an OpenPGP key pair.
Hence, if you already use OpenPGP (e.g. for e-mail encryption) and subshare finds your key pair, this step is skipped. Otherwise, a wizard leads you to the process of creating one:
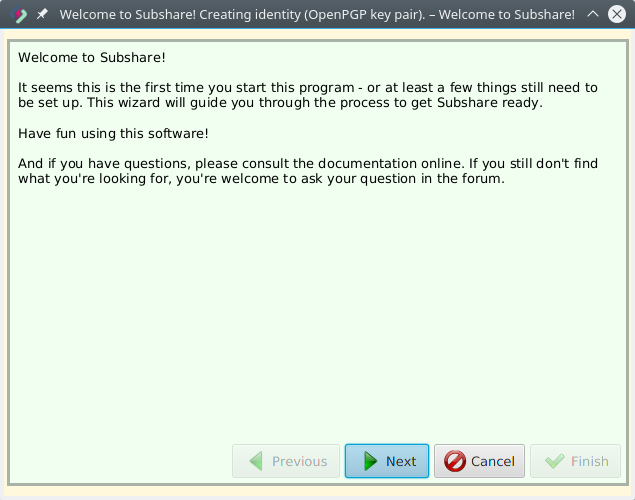
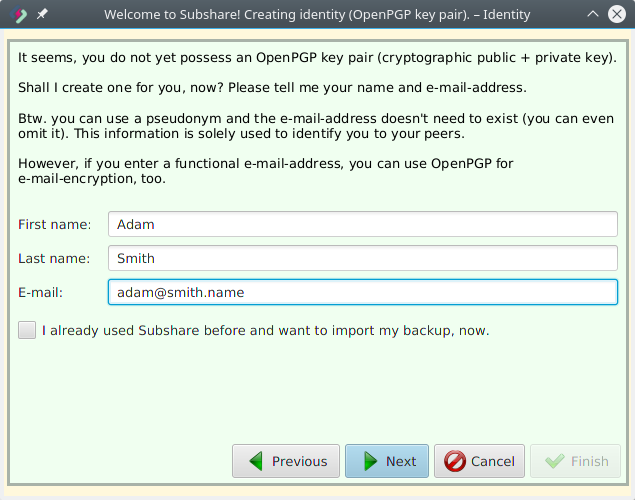
You can click “Finish” here — no need for further details. Nerds might find them interesting, though ;-)
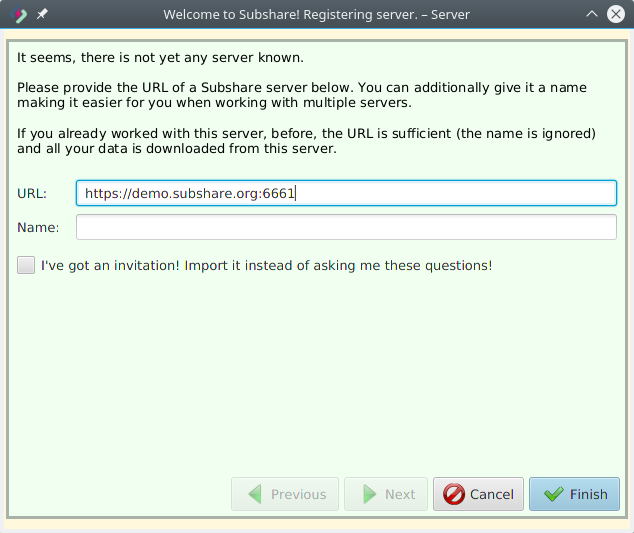
Specify server
The client needs to know at least one server. As already stated above, you can use our demo/test server with the URL https://demo.subshare.org:6661 for non-productive uses:
Backup
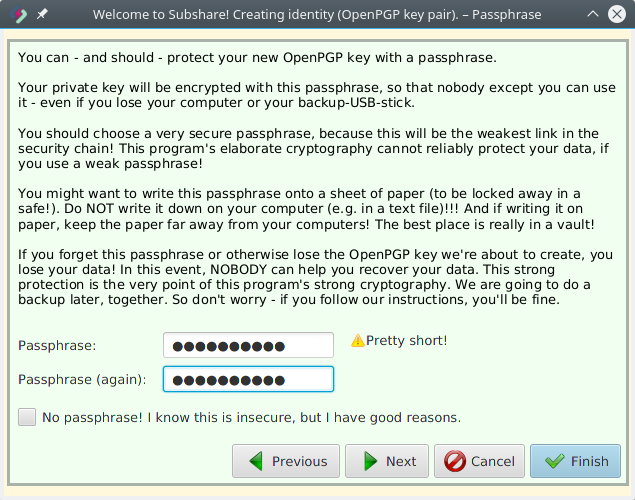
Since your OpenPGP key pair is essential, subshare now suggests to create a backup USB-stick. If you skip this, now, subshare is going to ask you again, later.
Please note, that you're going to need this backup, too, when you want to check-out your data on another computer.
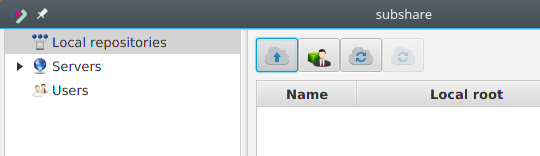
Create repository
In order to upload and synchronize a directory, subshare needs to create a repository on your server. Once this is done, the server's repository and the directory on your client computer are permanently connected — whenever the data on one side changes, the other side is automatically updated.
The process is started by clicking the upload button:
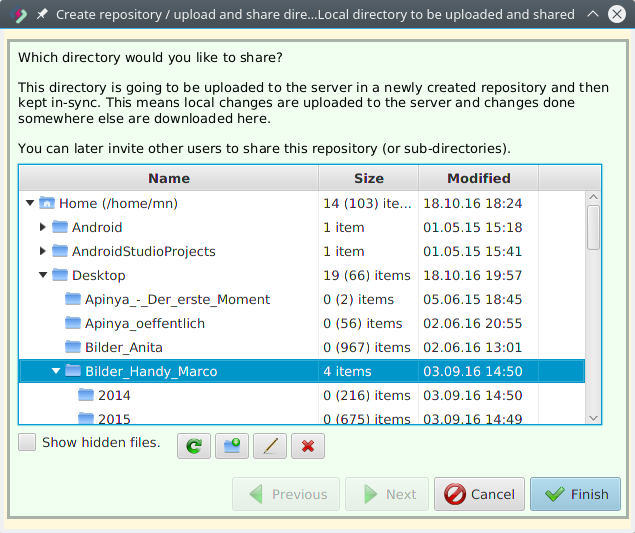
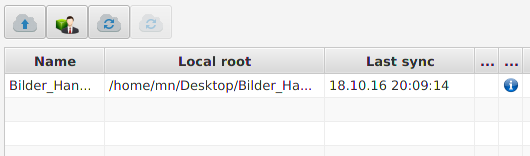
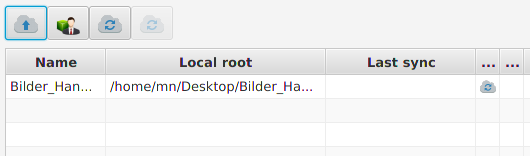
Click “Finish” and wait — you're done! The new repository is now listed in the table and its contents are synchronised between client and server:
Depending on your directory's size as well as your internet connection's speed, the initial upload to the server may take hours or even days. Please be patient.
If you cannot wait (or do not want to), you can interrupt this process. The next time you start subshare, it's going to continue where it left off.
When the sync is complete, the cloud-icon disappears and a blue info-icon is shown instead: